How to create a bundle
How do i create a bundle?
When you start creating a new bundle, the default configuration is the most often used and is sufficient for simple bundles. There are just a few things that you have to configure before you can click the Save button. A step by step instructions on how to create the most basic and simple bundle are below.
- Go to your Shopify store admin.
- Navigate to apps.
- Click on Bundler - Product Bundles.
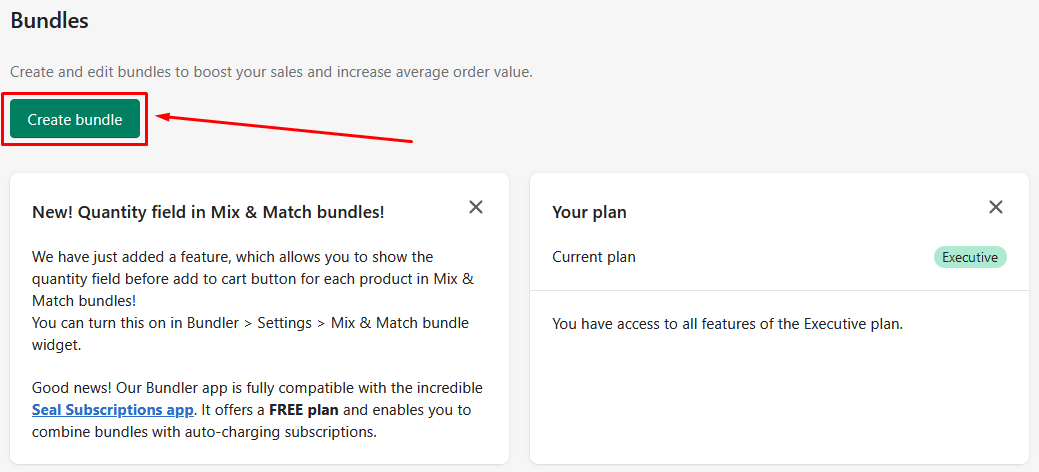
- Click on Create bundle button.
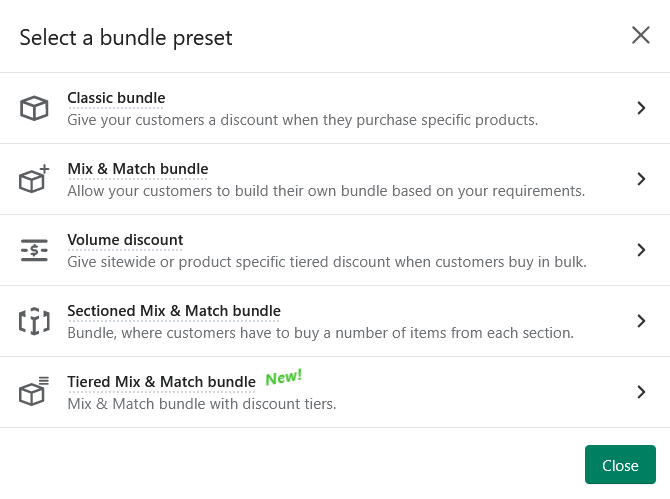
- Pick the desired bundle type. Bundler provides 5+ different bundle types. Pick the one that you would like to create.
- Input basic bundle information such as the bundle name and description
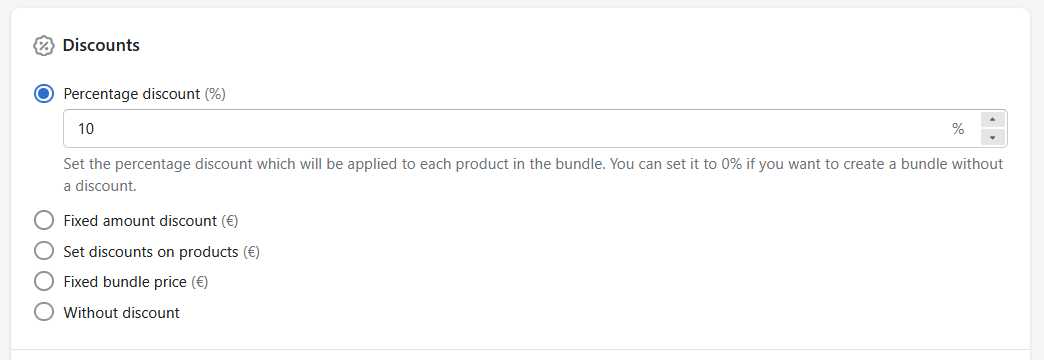
- Scroll down and set the desired discount. It can be a percentage, fixed amount discount, set discounts on products, fixed bundle price or without discount.
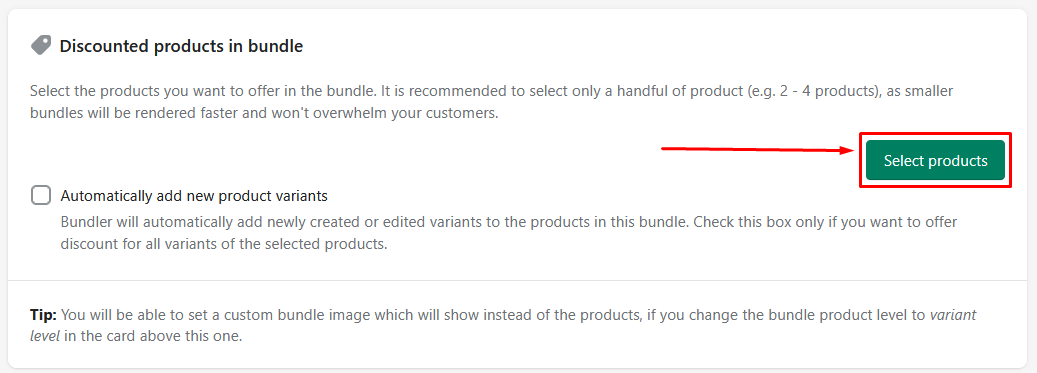
- Now, scroll a to the select product section, where you can pick the products that you would like to include in a bundle
- When you are finished, simply click ‘Save bundle’ button
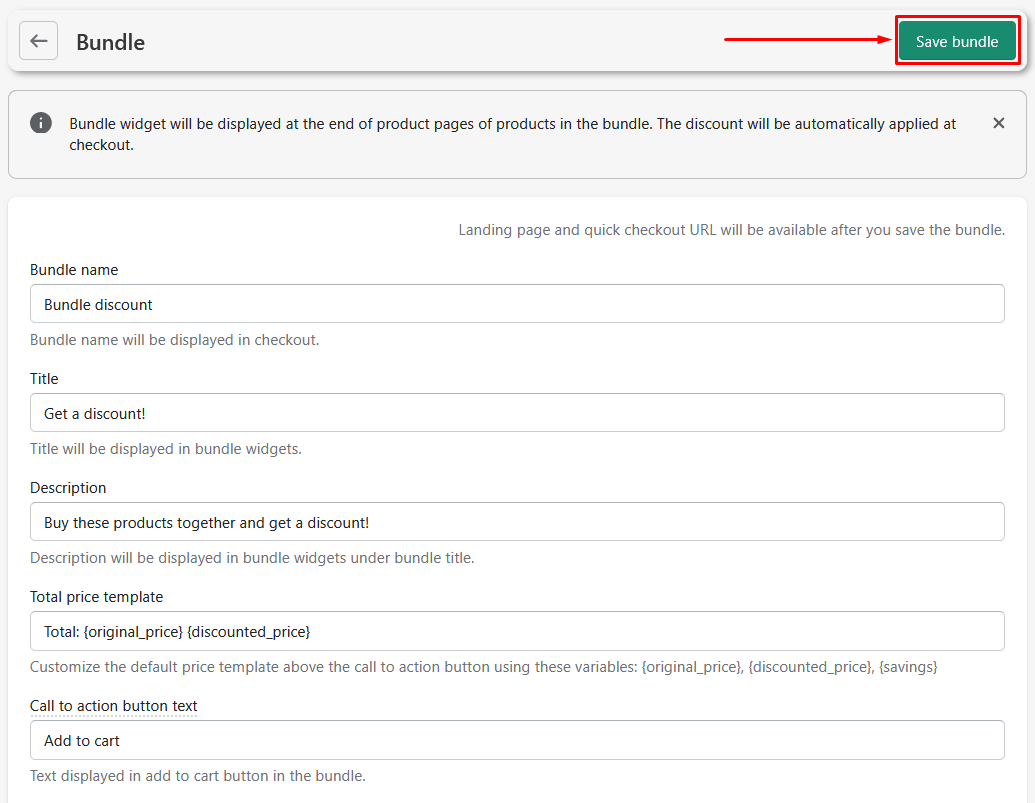
- Go to the product page of one of the products in the bundle and check if a bundle widget is displayed there :)
That's it, you now know to to setup the bundle correctly!
What is a bundle product level?
You might have saw it that when creating the bundle, you can change the bundle product level.
Bundle product level defines whether you want to treat product variants as standalone products in the bundle widget or as a part of the parent product. If you create a product level bundle then if a product has more than 1 variant, a dropdown selector will be displayed under such product (see example below).
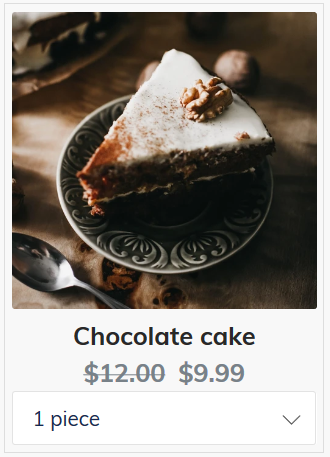
If you create a variant level bundle, this means that every variant will be displayed in the bundle widget as a separate product in it's own box and won't have a dropdown selector.

What are discount conditions?
Another useful setting when setting up bundle are Discount conditions. Discount conditions define how many or which products does the customer has to buy in order to receive the bundle discount.
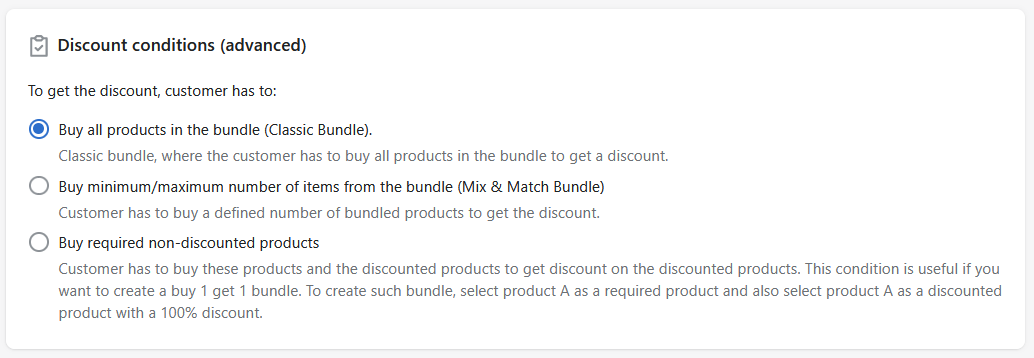
Buy all products in the bundle (default)
The default condition is to request that the customer buys all the products included in the bundle. This means that the customer will only receive the bundle discount if he buys all the bundled products together. You should use this condition if you want to create a simple bundle.
Buy required non-discounted products
The required non-discounted products are products which have to be purchased by the customer next to the discounted products. This is useful if you want to offer a buy 1 get 1 discounts. For such a discount, you select product A as a required product and also select product A as a product with a 100% discount.
Buy minimum/maximum number of items from the bundle
Condition for minimum and maximum number of items from the bundle allows you to make dynamic bundles. For example, if you set the minimum numer of items to 3, this means that the customers will have to buy 3 items from the bundle to receive a discount. This could be 3 items of the same product or 3 different products. If you also set the maximum allowed number, you limit the maximum number of items to which this discount still applies. E.g. if you also set the maximum number of items to 4, your customers will now have to buy from 3 to 4 items from your bundle to receive a discount.
You have to be a bit careful with this kind of a discount though. There is also a maximum quantity limit for each product which you have to set correctly. If you want to allow the customers to buy 3 of the same product, then you also have to increase the maximum allowed quantity of each product to at least 3.
That's it! We hope this guide helps you on your way of creating wonderful bundles in your store! :)