Shopify: How to add products to your store [2024]
Shopify, being one of the largest e-commerce platforms is constantly evolving and is helping many merchants sell products online. With it's incredible easy to use user-interface, and dozens of apps available on the market, you can make your online store just like how you imagined it. If you are a newer merchant, we will show you one of the key steps involved when making your Shopify store: adding products. Adding products is a very simple process and you will quickly get used to it, so don't worry.
A quick and straightforward guide on adding products to your Shopify store is the following:
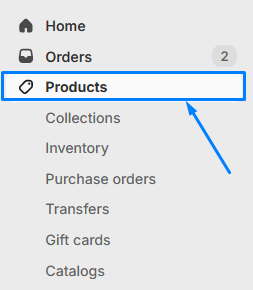
- Go to Shopify Admin → Products
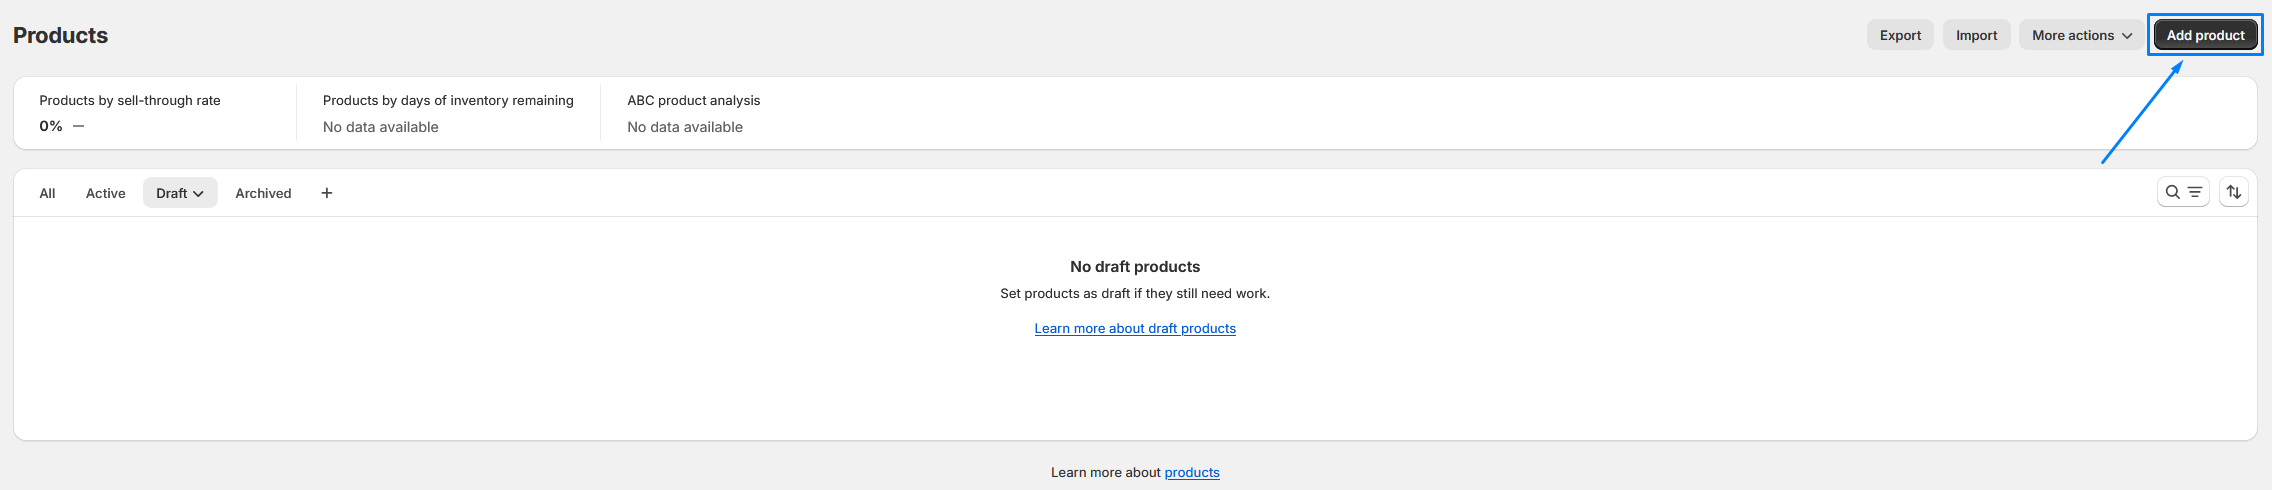
- Click on Add product
- Enter title and description of the product,
This is the name of the product and the description of the product, where you can describe whatever you would like to describe regarding your product - Add the product image,
- Add the product price. You can also add compare-at-price and cost per item, if you wish to.
- Setup inventory, shipping, and variants, if needed.
- Click on save.
Later, we will also show you some tips on improving your products in your Shopify store and showing you some basic features of them, that you might find useful.
Step-by-step guide on adding a product in the Shopify App store
1. Product Page
Let's first go to the main page of adding and managing products in Shopify. The products page. You can find it simply by going to Shopify Admin → Products. Then, click on the Add product button, to add your first product.
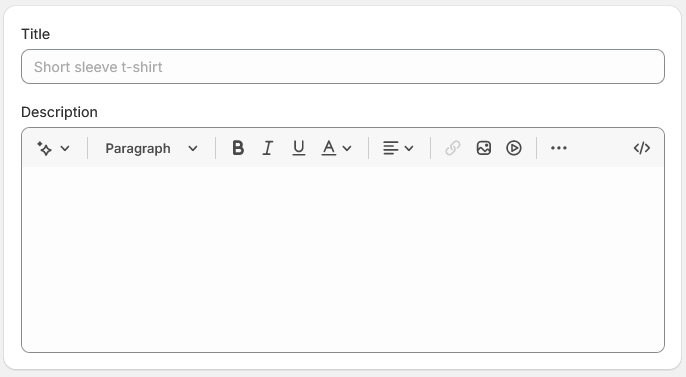
2. Give your product a name and description
Now that you are on the add product page, it's time to enter the basic information about the product. First, enter name and a description of the product.
The name should go straight to the point, and you mostly already have an idea of what your name of the product will be.
Then, find a unique product description that will clearly describe the product. This could be instructions on how to use the product correctly, materials that the product is made from, and other things that online stores often use to describe products.
Shopify now even supports AI generated text that you can use to generate the description by entering just a few simple main features and keywords about your product, pick a tone of voice, and give it special instructions and the tool will automatically generate the description for you!
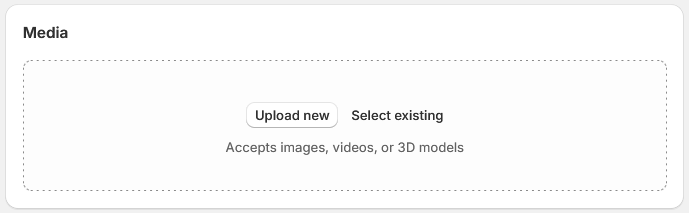
3. Add media
Every product gets instantly recognized with images. When customers scroll through different pages of your products, the first impression they will have are the images of the products. If the image grabs their attention, they will then further proceed with deciding if they want to buy the product or not.
Not only images, but you can even add videos, and 3D models of your products, if your products are the kind that would fit great with those.
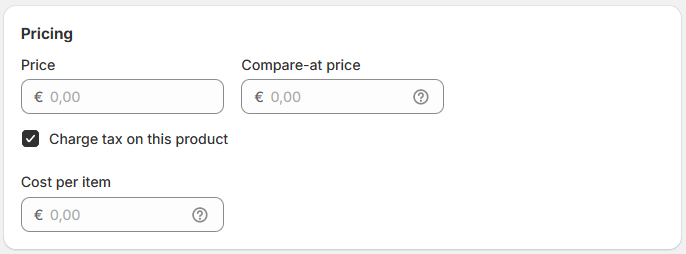
4. Set a price of the product
Most likely the most important thing when customers consider before proceeding with the purchase is, the overall price of the product.
You can also set-up the compare-at-price if you are doing any sort of discounts. This means that the crossed-out price will appear next to the current price of the product.
The last option is also if you decide to charge tax on product, or not. This means that if the sales tax will be applied to the product or not. If checked, Shopify will automatically calculate the sales tax at the checkout, when the customer gets there.
Cost per item is a setting that is not visible to your customers and means how much is your cost when you acquire or product the product.
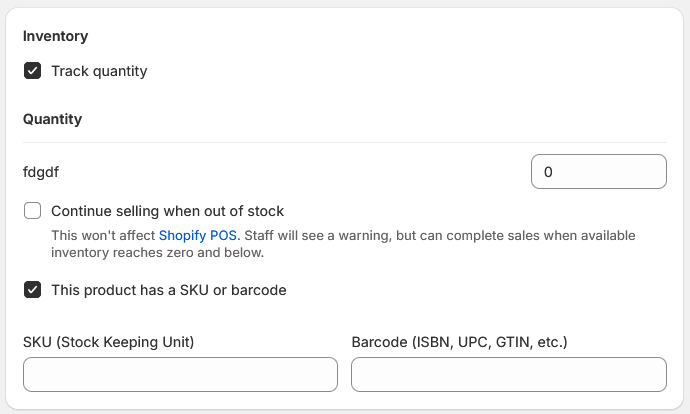
5. Setup the inventory settings
Inventory settings are very important when it comes to managing products. This is the identity of the product and a way where you could track it.
In the Inventory section, you have the option to enable to track the quantity of the product.
You can also enable the option to continue selling certain product, when it's out of stock. This means that when your customer makes a purchase, you will need to make sure that the item is in-stock at a later date, in order for the customer to receive the product.
Now, onto the setting up SKU (Stock Keeping Unit), which is very important when it comes to tracking and managing inventory. SKU can be a completely random combination of letters and number, but a good practice is to use SKU with a meaning, where letters and number can identify the brand, style, pricing, color, and other properties of the product. There are two ways of adding SKU to a product. Manually, which can lead to errors and can be time-consuming, or with SKU generator, which can help you generate unique, meaningful SKU's for your products. There are some apps on Shopify app store, that can help you generate the SKU.
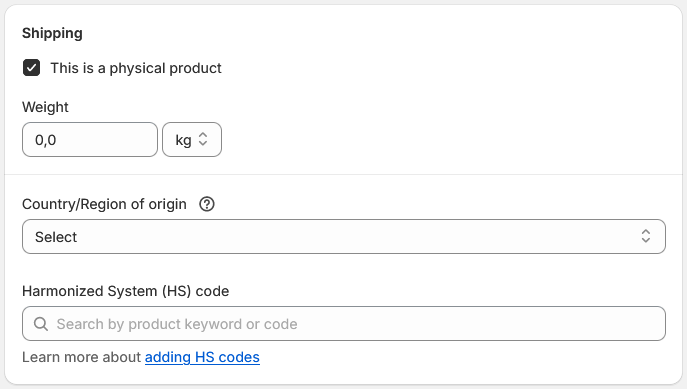
6. Shipping settings
Very important step for any physical product. Here, you can define the shipping weight for your product. This means how much the entirety of your package will weight, and not just the product. This includes the box that the product is in and everything else that you will be sending with the product.
Then, if you will sell internationally, check the option Add customs information, and select the country of origin from which the products will be sent from.
The next thing that you will need to enter is the Harmonized System (HS) Code, which is basically a number that identifies the type of the product that is being transported to another country. Usually, government's websites can provide you this number.
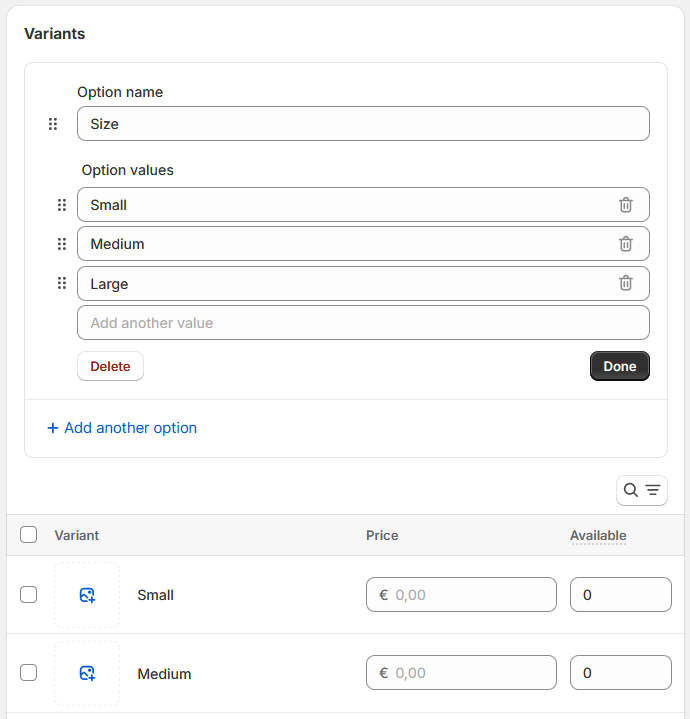
7. Add variants
There are many products that don't just come with a single style or variant. From colors, size, flavor, and more, your product can have many different options that your customers can pick from.
The option name is the name of the variant. For example, “Size”. And the option values are the values of the variant that the customer can pick from, so “Small”, “Medium”, “Large”, and so on. If you would like to add another option, simply click on Add another option.
As you are entering different variants, you will see that they will appear further below in this variants section. You can then further customize each variant, such as add different images for each variant, change the prices, and set the availability of each variant.
8. Product Organization setup
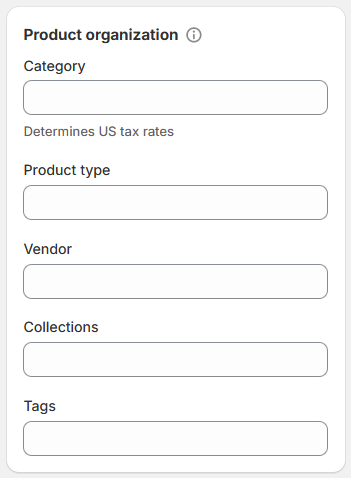
The last thing that we will need to setup is the product organization. This box is located on the right side of the page. This is the information that describes the group or class the product belongs to, and it is used for the tax calculation at the checkout.
First, pick the product category from the dropdown menu, then select the product type, which refers to the kind of product that you are selling. This helps organize your store and makes it easier for customers to find what they're looking for. Vendor is the brand of the product, collections where the product will be in (collection is a group of products in Shopify) and lastly, the tags for the product, which are the keywords associated with the product and can be used to filter products, or to use them with some other Shopify applications that are managing with products.
9. That's it! You have created your product!
Pretty simple right? All you need to do now, is click on the Save buttton, in order to save your product that you've setup.
So I have created a product. What now?
Great, you now have your very first product in the store. But did you know that there are many other things that you can do with that product and enable more sales in your online store? We will list some of the important things to consider and do in your online store to make customer shopping experience more pleasant and efficient.
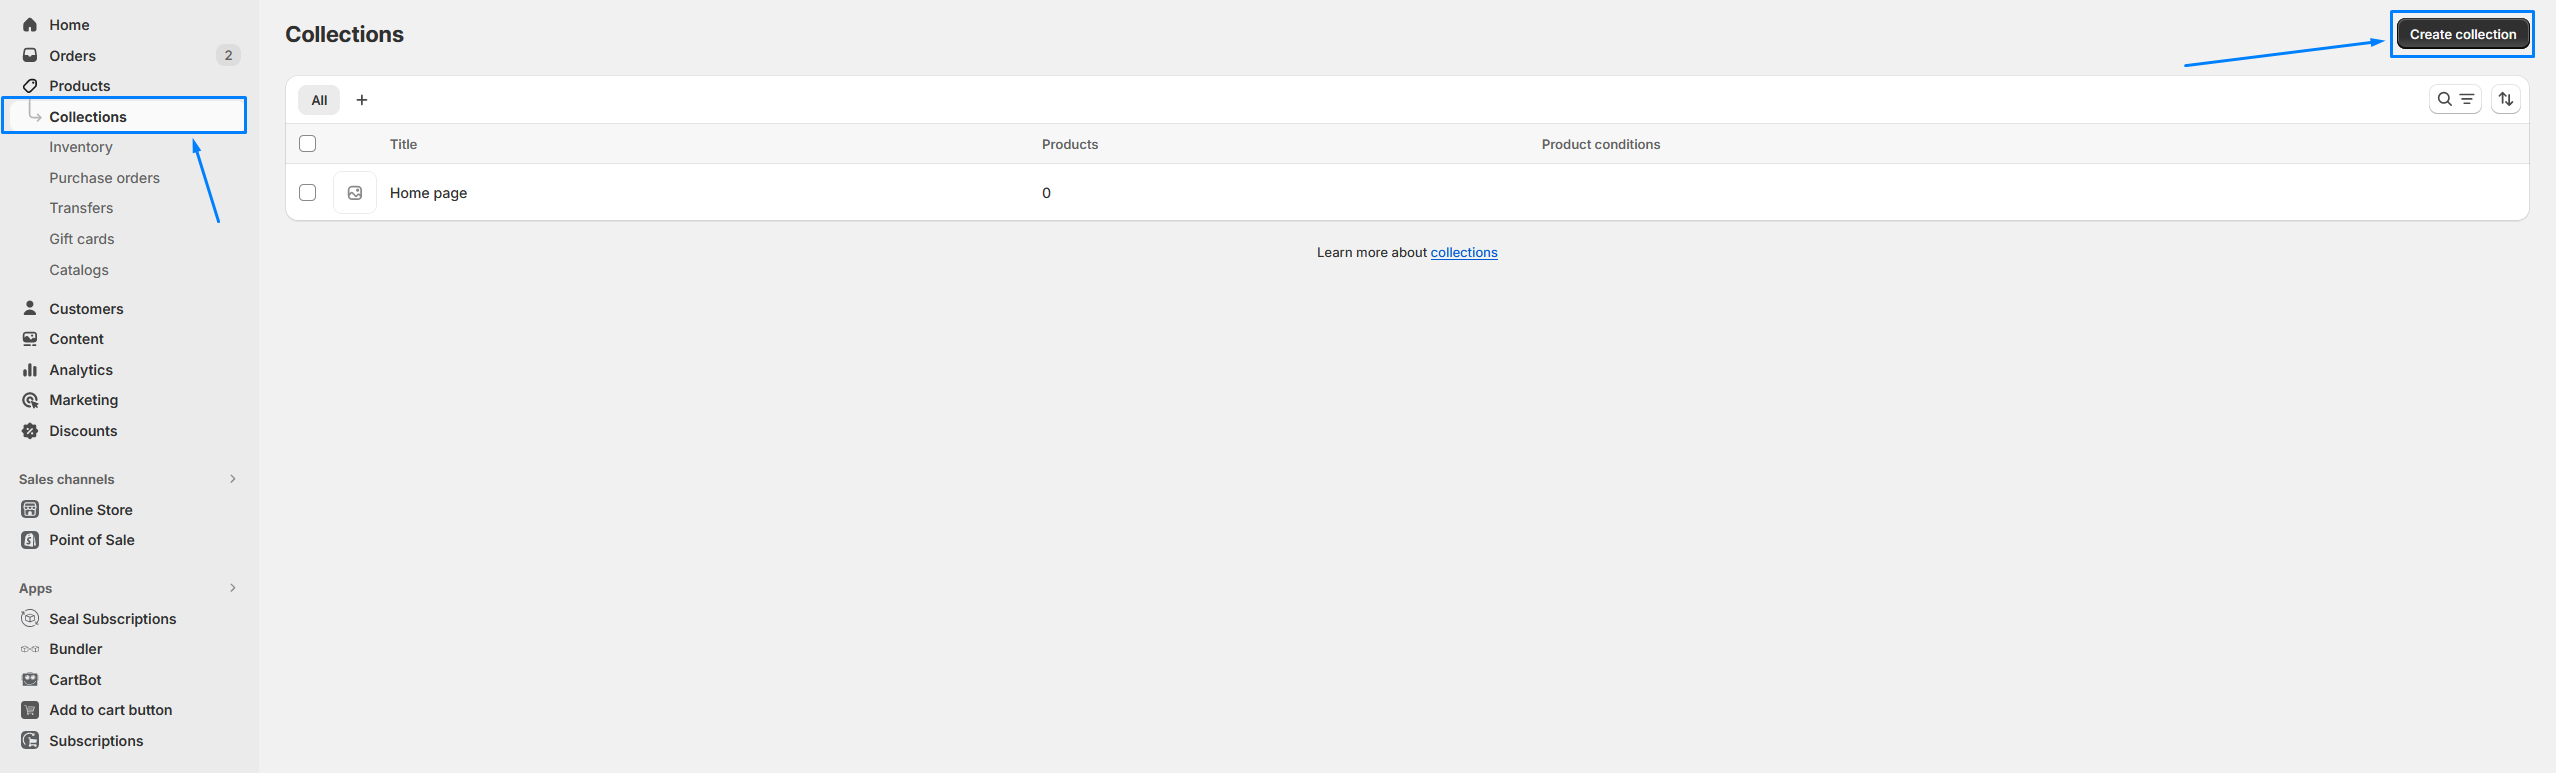
Make collections
Collection is a way to put more products together and it structures your websites so your customers can quickly access the products they are looking for. Adding a collection to your store has a lot of advantages. You can get started with collections by going to Shopify Admin → Products → Collections → Create collection
Then, simply specify the collection title and description and pick the collection type. You can also add the image to each collection, to separate it from the rest.
Update SEO (Search Engine Optimization) settings
Search engine optimization is more important than you think. Your visibility on the search engine results page is very important, since it means that if you rank high, you will also get more clicks to your online store and essentially more customers. This means that you should include SEO product keywords, create unique product descriptions,
By default, SEO will automatically use content from your product details. There are three key fields that are good-to-know and editing these fields: page title, meta description, and URL handle. You can read more about improving your SEO optimization settings here.
Display your products on other parts of your store
You can use many different page building apps on Shopify that enable you to display your products on other pages. This way, your customers can see and interact directly with your products on home page, collection page, and more. It is important that you promote your products on different parts of your online store to increase conversions. There are also popular apps that are dedicated to promoting your products, such as Bundler. We will talk more about them in the next point.
Use Shopify apps to enhance the shopping experience
While having normal product pages is fine, using Shopify apps to enhance the experience can significantly help your business, increase the revenue, and gain you more customers. For products, apps that add new shopping models to your products can be a nice touch, such as subscription models. This can motivate your customers to buy products, while you offer them discounts with subscriptions. A great app for that is the best subscription app in Shopify Seal Subscriptions. If you are interested more about them, check out their article here.
There are also other apps focused on promoting products. Promoting products is very important and there are many different apps that can help you with that. However, one of the best ones and recommended ones are bundle apps, such as Bundler. Bundles allow you to combine different products in your store, and sell them together, to usually offer discounts. This way your customers might rather buy the discounted bundles than single products.
Conclusion
As you can see, making a product in Shopify is a relatively simple process. However, there are many more things that you can do with your product, such as the four things mentioned above.
We hope this article helps you in starting your Shopify online store and we wish you all the best in the future! :)
Happy e-commerce building!